
Simple Guide on How to Do a Horizontal Scroll in Wix Studio
- Emilia Rose

- Dec 2, 2024
- 4 min read
Updated: Dec 6, 2024
Elevate your Wix designs with horizontal scrolling and transform your website from functional to professional. It’s a modern web design trend often used to display portfolios, showcase product galleries, or create engaging user experiences. In this tutorial, we'll guide you through the process of creating stunning horizontal scroll effects using Wix Studio's powerful tools.
No coding skills required! We'll break down the process into simple steps, from setting up the basic CSS Grids to adding captivating animations. So, let's dive in and transform your Wix designs with this exciting technique.

Content
Why Use Horizontal Scroll?
Horizontal scrolling isn’t just visually appealing—it’s functional too. It’s perfect for:
Showcasing a range of items, such as products or images.
Adding creative flair to your site.
Breaking away from the traditional vertical scroll for a unique user experience.
When used with Wix Studio, horizontal scrolling integrates seamlessly into your site, enhancing both the user interface (UI) and user experience (UX).
Step-by-Step Guide to Creating a Horizontal Scroll
1. Setting up the Stage
Create a New Section: This will be the container for our horizontal scroll.
Apply CSS Grid: Divide the section into three rows using CSS Grid.
Set Row Heights: Set each row to full height of the viewport which is 100VH.
Understanding Viewport Height
In web design, the "viewport" refers to the visible area of a web page in a browser window. Viewport height (vh) is a unit of measurement that is relative to the height of the viewport.
Setting Row Heights to 100vh
Content Considerations
Creating the Scrollable Container:
In your editor, add a container to your section. This will act as the base for your scrolling content.
Add a Container: This container will hold the elements you want to scroll horizontally, add this to the first row.
Size the Container: Set the container's width to 200vw (viewport widths) to ensure it overflows the screen.
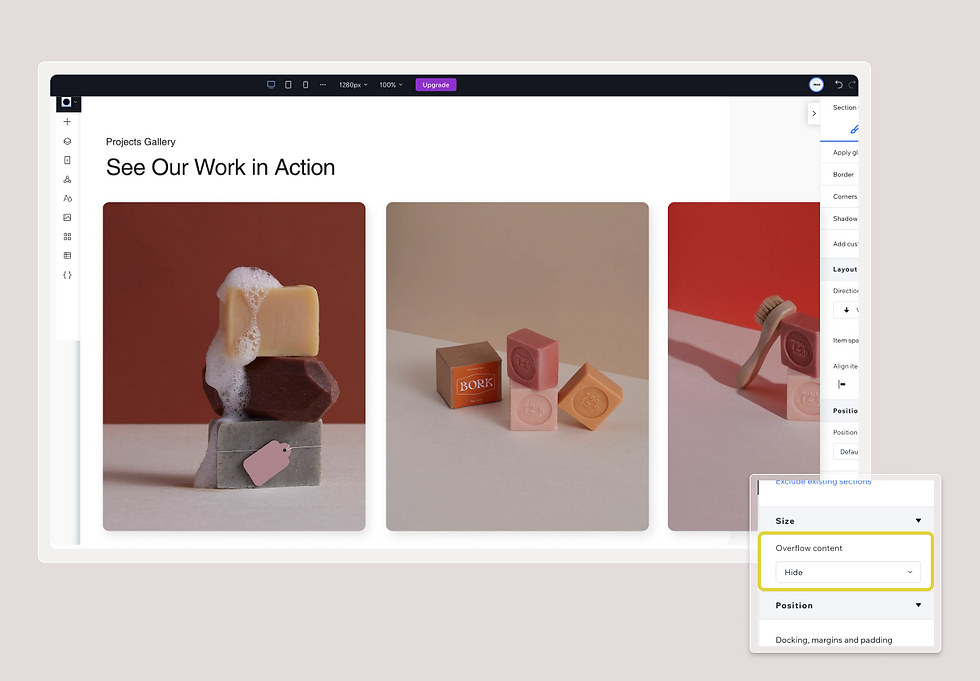
Set Overflow Visibility: Adjust the whole page and section overflow settings to Show so you can see the overflowing content.
Designing the Scrollable Content:
Add Elements: Place your desired elements (images, text, etc.) within the container.
Layout the Elements: Use a grid layout or other suitable layout techniques to arrange elements horizontally.
Make it Sticky: Make sure the container postion type is set to sticky, you can find this in the position pannel.
Creating the Scroll Trigger:
Add a Trigger Container: This container will trigger the animation when it scrolls into view.
Position the Trigger: Place the trigger container in the second row and strech it fit the row. Then using the dockings pannel, set its right margin to a value (e.g., 95%) to push it to the righ screen.
Label Container: Label containers, trigger and horizontal in the page pannel.
Why a Trigger Container?
In web development, we often use triggers to initiate actions, such as animations. In this case, we're using a container element as a trigger to start the horizontal scroll animation.
How Does It Work?
Why the Second Row?
Visualizing the Concept

5. Setting up the Animation:
Select the trigger Container: Go to annimation and effects and click scroll effect
Add a Scroll Animation: Create a scroll animation that moves the container from its original position to the left.
Set Animation Parameters:
Container: Select the horizotal container
Animation Path: From its design or 'Out'
Animation Type: Move
Angle: 270 degrees (leftward movement)
Distance: 100vw (equal to the container's width)
Animation Area: 0-100% (triggers the animation when the trigger container enters and leaves the viewport)
Fine-Tuning and Optimization:
Adjust Breakpoints: Ensure the design looks good on different screen sizes.
Hide Overflow: Once the animation is set up, hide the overflow on the page and section to prevent unwanted scrolling.
Add Parallax Effects (Optional): Animate other elements, like images or text, to create a layered scrolling effect.
Horizontal scrolling is a powerful way to make your website memorable. With Wix Studio and its intuitive design tools, you can create this effect without touching a single line of code.
Ready to transform your site? Start experimenting today and explore more web design inspiration with Wix Studio.
By incorporating horizontal scrolling into your design, you’ll not only capture attention but also offer a modern browsing experience. With these tips, you’re well on your way to creating stunning, user-friendly websites.
Looking for more Wix Studio tutorials? Stay tuned for our next blog post!

Emilia.Co Design Studios


_edited.jpg)
Kommentare