
Mastering Dockings, Margins, and Paddings in Wix Studio
- Emilia Rose

- Dec 6, 2024
- 3 min read
Creating a professional and responsive web design often comes down to one critical skill: mastering the art of positioning elements. If you’re new to Wix Studio, this is one of the first things you’ll want to learn. In Wix Studio, Dockings, Margins, and Paddings are powerful tools to design visually appealing and user-friendly layouts. Let’s break them down and learn how to use them effectively.

What Are Dockings, Margins, and Paddings?
Think of your website as a box filled with smaller boxes (elements like text, buttons, or images). Dockings, Margins, and Paddings decide where these smaller boxes sit and how much space surrounds them. Here's what each term means:
Dockings
Docking pins an element to a specific side of its container (top, bottom, left, or right). For example:
Top Docking: Keeps the element stuck to the top of its container.
Right Docking: Anchors the element to the right side.
Stretch Docking: Makes the element expand to fill the container.
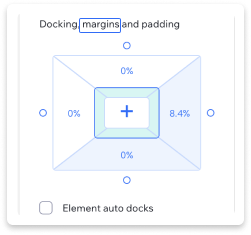
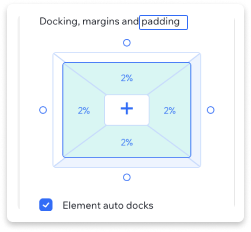
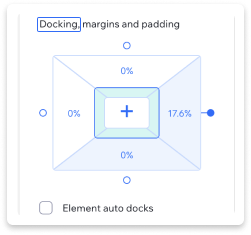
Margins
Margins are the empty spaces outside an element. Think of them like the buffer zone between one element and its neighbors.
For instance:
Adding a left margin pushes the element away from the left side of its container.
Paddings
Paddings are spaces inside an element, between its content and its border.
Example: Adding padding to a text box creates space around the text inside it.
Why Do Dockings, Margins, and Paddings Matter?
These tools are essential for creating designs that:
Look Balanced: By controlling spacing, you ensure your layout isn’t too crowded or too sparse.
Adapt to Screen Sizes: Dockings help your design stay aligned on desktops, tablets, and phones.
Guide the Viewer’s Eye: Thoughtful spacing can emphasize key parts of your website.
Step-by-Step Guide to Dockings, Margins, and Paddings in Wix Studio
Here’s how to adjust these settings:
1. Select an Element
Click the element you want to adjust (e.g., a button, image, or text box).
2. Open the Inspector Panel
On the right side of the Wix Studio editor, you’ll see the Inspector Panel. This is where all the positioning magic happens.
3. Adjust Dockings, Margins, or Paddings
Dockings
Look for the "Docking" options in the Inspector Panel.
Click on the Top, Bottom, Left, or Right Docking pins to anchor the element.
Use the Stretch option if you want the element to fill the entire width or height of its container.
Margins
Locate the “Margin” sliders or input boxes for Top, Bottom, Left, and Right Margins.
Adjust the values to add space outside the element.
Paddings
Similar to Margins, find the Padding options in the Inspector.
Add or reduce padding to adjust the space between the element's content and its border.

Live Example: Fixing a Button and Burger Menu on Mobile
Let’s solve a real-world issue step by step.
The Problem:You have a button on the right side of your header and a burger menu on the left.
On a mobile screen that’s 700px wide, the button and burger menu are far apart.
On a smaller mobile screen (320px wide), they’re too close together.
The Fix: Docking
To keep everything spaced neatly:
Select the Button
Click the button to highlight it.
In the Inspector Panel, dock it to the Right with a 3% offset.
Select the Burger Menu
Click the burger menu.
Dock it to the Left with a 2% offset.
Preview the Design
Switch between screen sizes (e.g., 700px and 320px) to see the difference.
The button and burger menu will now stay aligned and spaced properly across all screen sizes.
This method works because docking ensures that elements stay pinned to specific sides, and the percentages keep the spacing consistent.


Best Practices for Using Dockings, Margins, and Paddings
Experiment with Screen Sizes: Always preview your design on multiple devices.
Keep Spacing Consistent: Use similar margins and paddings across your site for a cohesive look.
Don’t Overdo It: Too much space can make your design feel disconnected, while too little can make it look cramped.
Use Stretch Wisely: Stretch docking is great for banners or full-width images but can overwhelm smaller elements.
Try It Yourself
Now that you know how to use dockings, margins, and paddings, it’s time to practice! Open Wix Studio and try adjusting the position of different elements. Experiment with percentages, docking pins, and spacing to see what works best for your design.
Have more questions or need help with something specific? Drop a comment below, and let’s figure it out together!
Emilia.Co Desing Studios

_edited.jpg)
Comentarios